Potd if You Die Solo Do You Have to Start From Floor 50 Again?
"
In the subterranean city of Gelmorra, deep inside a forgotten corner of Issom--Har, stout-hearted explorers have uncovered the entrance to a labyrinthine dungeon. Those who set foot inside its maddening halls find their vigor drained by an irresistible fog of innervation, and repeated excursions have failed to map its seemingly inconstant architecture. After hearing spooky accounts of spectral denizens, locals took to the whispering of a "Palace of the Dead", and the Wood Wailers now seek the assistance of adventurers in laying blank its haunted secrets...
— FinalFantasyXIV.com
The Palace of the Dead (unremarkably abbreviated as PotD) is a Deep Dungeon released on nineteen July 2016. Information technology's located in S Shroud at Quarrymill (X:25.2 Y:20.half dozen), and becomes accessible after completing the quest The House That Death Built. Equally a roguelike dungeon[1], the Palace of the Expressionless's objective is to descend each varying flooring, fighting creatures along the way while dealing with hazardous environments, until eventually reaching a boss that awaits at the lesser level.
Mechanics
The Palace of the Dead has specific features for characters and data saving.
Entry interface
Players tin can enter the dungeon or manage character information past talking to Wood Wailer Expeditionary Captain, located in Quarrymill. He offers the following interface:
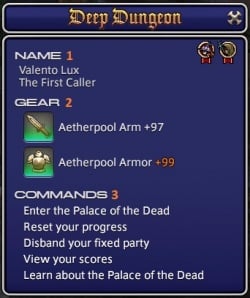
Each choice means:
- 1- Proper noun — Grapheme proper name and championship.
- 2- Gear — Character aetherpool gear level, including armor and arm (more information below).
- three- Commands — Commands to enter Palace of the Dead, manage salve data, reset save information, or learn more about the dungeon.
Important: Regardless of which option is called (new run, load slot, reset slot, etc.), the aetherpool gear level volition never be erased. The simply fashion that aetherpool data may be lost is by expending gear level for Padjal or Kinna weapons (more than information below).
Enter the Palace of the Dead
This option serves to enter the dungeon. Information technology offers two slots to save your progression within Palace of the Dead. You may pick an empty slot to get-go a new run, or load a previously saved run.

Inbound the Palace of the Dead has the following requirements:
- Class requirement: Disciple of War or Disciple of Magic
- Particular level requirement: None
- Item level sync: None
- Party size: Calorie-free Party (up to four players)
- Time limit: 60 minutes
- At that place are extra requirements depending on level range:
- 51-100 — Players are required to complete level 50 and the quest What Lies Below.
- 101-200 — Players are required to be in a fixed party.
In that location are two options to manage Palace of the Expressionless entry:
- Enter with a fixed party: You will start the run with a pre-fabricated party (or solo), and you can just load this slot with members having the aforementioned respective progress slot available (this includes all party members and party limerick called upon registering). This is as well the only way to progress past level 100.
- Enter with a matched party: The Duty Finder volition attempt to match a party seeking the aforementioned floor every bit your party. Similarly, you lot can only load this slot with members having the same corresponding progress slot available. Y'all may just progress up to level 100 using this pick.
Additionally, there are two floors from which players can get-go:
- Flooring one: Showtime on floor number 1.
- Flooring 50-i: Start on flooring number 51. This pick is only bachelor after yous accept cleared floor l.
Reset your progress
This option will prompt you to reset your progress, and information technology volition completely erase your data. Remember that this process cannot be undone.
Disband your party
This option converts a fixed party saved data to a matched party saved information, and reset pomander data. Under these conditions y'all will be able to be matched with other players who are currently playing on the same floor equally you. If any members of a fixed party are unable to enter the deep dungeon later on the deletion of save data or usage of the world transfer service, they must select "Disband your fixed party" to carry over their salvage information.
View your scores
When challenging the Palace of the Dead, players receive a score based on a number of factors such as highest floor reached and number of enemies slain. Separate scores for both solo and party play will be assigned later on being defeated or immigration certain floors. The scores of players who venture beyond floor 100 may also announced on the rankings page on the Lodestone.
This selection shows your score per form/job, and takes you lot to the Lodestone.

Acquire about the Palace of the Dead
This option shows additional data most the Palace of the Dead.
Character growth
The Palace of the Dead employs a gear up of rules and mechanics unique to the deep dungeon.
Level
Upon registering for flooring i, players volition start at level one regardless of their electric current class or job level; for floor fifty-one, players will continue from level 60. By defeating monsters that appear in the dungeon, players will be able to proceeds EXP and level their characters up to threescore while beneath floor 51. The levels gained in progression of the dungeon, nonetheless, volition not exist the same every bit what players volition receive upon immigration.
Your level inside the PotD can exceed your class level.
Feel
All enemies players run into in the Palace of the Dead will requite a fixed amount of EXP regardless of the number of members in your party or the difference in level between you and the enemy. Rested experience and feel bonuses (e.thou. foods) volition also be ignored.
Players take the full 60 minutes to run around and level up, but in one case you move forward you lot can't go dorsum and go on your progress. The bodily character feel gained is based on your electric current PotD level when you consummate the set of floors. The amount is approximately 30% of a level for the showtime 10 floors, and is incrementally x% college for completing each subsequent floor prepare. This experience is awarded every fourth dimension the floor fix (x floors) is cleared.
Actions
There are no adjustments to or restrictions on whatever actions, function actions, or statuses. However, players must first accomplish the required level in the dungeon to take access to them. Players will even have the opportunity to proceeds deportment and statuses above their electric current level regardless of whether they have completed the necessary grade or job quests.
Please note that players who have entered the deep dungeon with a class volition exist restricted from using any job deportment. Part slots become available at the levels at which they would during normal leveling.
Consumables
You tin can apply whatever consumable detail, including those from outside the PotD. HQ potions volition drop from enemies inside. A skilful supply of HQ potions will brand classes without heals feasible every bit well as Sustaining Potions exchanged for Empyrean Fragments, but they volition demand to beware traps. Several traps within cause long-duration status effects which can be cleansed unremarkably using the corresponding potions. Food will provide a do good to stats, only not to XP gained.
Aetherpool Gear
When entering the Palace of the Dead players are assigned an aetherpool rating. It's a measure of your grapheme strength and defense force within the PotD, and should be directly considered a stat. As long equally the histrion completes a floor ready (every ten floors), any gains made are permanent (saved). It is the only aspect which affects your character in the PotD (aside from level), and it's not tied to whatever grade, weapon, or gear.
Strengthening aetherpool gear
Aetherpool gear can be enhanced by accessing Silver Coffers. These coffers appear randomly on each floor and later defeating sure enemies (east.g. nether the effect of Pomander of Fortune). When enhancing gear, there is a chance of failure that varies depending on the electric current level of your gear and the flooring where the argent coffer is found. Aetherpool gear tin be enhanced to a maximum strength of +99. In the event the forcefulness of your aetherpool gear exceeds the maximum allowed by your current level, its attributes volition be synced.
Fully upgrading a character aetherpool gear requires repeating floors. Nonetheless, aetherpool gear volition non exist upgraded if its rating would become a higher number than the flooring you are on, i.e. it'south not possible to farm floors one-10 to maximize your stats for example. Failed attempts at enhancing aetherpool gear volition show the message: "Your aetherpool arm/armor remains unchanged."
Although upgrades are not guaranteed when the level exceeds your aetherpool rating, the greater the departure, the higher the gamble that you volition gain a +3 increase instead of +ane. (Your aetherpool arm/armor flares, instead of flickers).
Progress and syncing
Upon successfully finishing a Palace of the Dead run – completing all ten floors – whatsoever aetherpool progress and Accursed Hoards obtained are kept. Declining to complete the duty due to time running out or political party KO, before finishing the tenth level, will effect in lost progress to experience, attained aetherpool gear level, and Accursed Hoards obtained.
Afterwards level i, your aetherpool gear will be synced if its rating is higher than 1/two your current level.
Gear durability and spiritbonding
Aetherpool gear is non subject to durability loss, nor tin can it gain spiritbond when within the Palace of the Dead. This besides applies to any gear equipped upon entering the instance.
Floor mechanics
Within Palace of the Dead, players are subject to various mechanics. The Graphic symbol Panel is changed to show the player's current aetherpool gear level (arm and armor), current pomanders available, and agile pomanders. The map is also inverse to show each floor map; note that information technology is hidden at the start and it'southward uncovered as players progress throughout the rooms.
Map
Hitting Thousand now shows the Palace of the Dead floor map forth with a header UI.
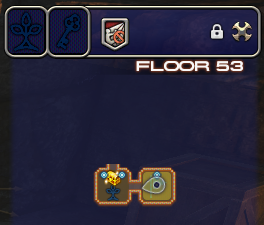
The map displays the following data:
- Header UI
- Cairn of Return activation status (more than information beneath).
- Cairn of Passage activation status (more than information beneath).
- Map enchantments — Each flooring can have agile enchantments on it; these modify diverse aspects of gameplay such as quicker cast/recast time, or reduced party impairment, etc. More information below.
- Floor level.
- Map UI
- Floor rooms — The rooms are uncovered every bit players visit them. The Pomander of Sight uncovers the whole floor at once.
- Each flooring may contain additional information:
- Greenish flag — This is the initial room when you are first transported into the flooring.
- Leaf-similar icon — This icon denotes the Cairn of Return.
- Key-similar icon — This icon denotes the Cairn of Passage.
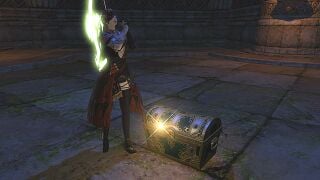
- Gilt chests — These are the Aureate Coffers, which incorporate buffs in them (more than information below).
- Silver chests — These are Silver Coffers; they offer a chance to strengthen your aetherpool gear (more data below).
- Bronze chests — These are Statuary Coffers; they incorporate items in them (more information below).
- PS: If a room contains a Gilt Coffer, the map will always display but a aureate chest icon in that location. This ways such room yet has a chance to have a Bronze/Silver Coffer. That may confuse groups that use a Pomander of Sight to reveal the whole floor, and are seeking Bronze/Silverish Coffers.
Cairn of Return
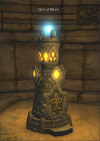
Cairn of Return is a magical resurrection device within Palace of the Dead. Information technology serves to resurrect fallen political party members. Similarly to Cairn of Passage, in order to utilize information technology players demand to impale creatures until it'due south lit up. For groups with no jobs able to resurrect, information technology's very of import to have Cairn of Return activated in case someone dies.
Cenotaph of Render indicates how far information technology is from activation past the header icon above the floor map.
Cenotaph of Passage

Cairn of Passage is a magical transportation surface area within Palace of the Dead. It serves to teleport the group to the next floor. In order to activate it, players need to kill creatures in the floor until it lights up. Once it'due south lit, all members must stand up within the glowing area to teleport to the adjacent floor. Annotation that the Cairn of Passage won't teleport the group if someone is in combat, therefore requiring to kill whatsoever aggroed creatures, or if someone is dead.
Cairn of Passage indicates how far it is from activation past the header icon to a higher place the floor map.
Graphic symbol panel
Character console is changed while inside Palace of the Expressionless, and displays information related to the current floor or set of floors.
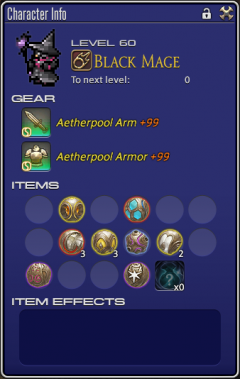
This UI displays the following information:
- Level, class/job, and experience to the next PotD level.
- Aetherpool gear level — This is cleaved into arm (strength) and armor (defense), each can increase up to +99.
- Items — This is a list of all pomanders obtained in the current run, as well as accursed hoards acquired.
- Detail effects — This is a list of all active pomander furnishings within PotD.
Environment
Palace of the Expressionless rooms.
Palace of the Dead is a dangerous place, and its danger increases at each floor the grouping descends. Floors are equanimous of rooms which contain mostly hostile creatures awaiting players to attack, but they may also hold treasures for those bold enough to venture forward. Each group of x floors, chosen flooring gear up, is considered a PotD run, and beating all ten levels will complete the duty.
All creatures inside PotD are hostile and volition aggro on sight. Brute density varies with each room and flooring level, and as players descend to lower floor sets, some patrolling mobs will start roaming the rooms to grab players off guard. At every tenth level there will be a boss guarding the get out; chirapsia the boss completes the flooring prepare, and awards players all rewards obtained over the course of the duty.
Hostile coffers
These hostile coffers are random, and can exist encountered in about levels:
- Silver Coffer Trap — This silver coffer look like a regular i, but volition explode upon opening, dealing high damage in an area effectually it. It'due south recommended players don't attempt to continue walking until they have their health back. It'due south fairly common for groups to wipe because players chain Silver Coffer Traps with explosion traps, since both cause high AoE damage, instead of continuing still to recover their health.
- Gilded Coffer Trap — This golden countinghouse also looks like a regular i, merely will become a Mimic upon opening. Since Mimics can utilize the Pox debuff, which causes impairment over time for x minutes, they should be killed quickly before having a chance to apply the debuff.
Flooring enchantments
In that location's a gamble for some floors to take one or more special effects. These effects which bear upon the whole flooring are called enchantments.
| Enchantment | Clarification | Notes |
|---|---|---|
| | HP regeneration for all part members is disabled. | Applies to out-of-gainsay passive HP regeneration. |
| | Accuracy of all party members is reduced. | This enchantment finer causes all attacks to miss more often. |
| | Harm dealt by all party members is reduced. | |
| | Enemy movement speed is increased. Enemies also deal more than damage while taking less. | The environment acquires a gloomy, pink-filled mist effect. |
| | Weaponskill recast time, spell recast time, and auto-assail filibuster for all party members are reduced. | |
| | Maximum HP and MP of all party members are increased. | |
| | Maximum HP of all party members is reduced. | |
| | Use of abilities is prohibited for all party members. | |
| | Use of items (including pomanders) is prohibited for all party members. | |
| | Knockback and draw-in furnishings for both enemies and allies are disabled. | Manticore transformation attacks are greatly reduced since damage is based on knockback. |
| | Use of the activeness Sprint is prohibited for all party members. |
Pomanders
Pomanders are items exclusive to Palace of the Expressionless acquired by opening Golden Treasure Coffers. Each pomander has an effect that may change party strengths, enemies around them, or the room itself. At that place are three pomanders which affect the adjacent flooring: Pomander of Affluence, Pomander of Amending, and Pomander of Flight; all other pomanders take effect immediately for the current floor. For example, Pomander of Sight immediately reveals the current floor, while Pomander of Affluence will increase the number of treasure coffers for the adjacent floor.
Pomanders can have a maximum stack of three per type, whatsoever backlog will be returned unless the pomander is used. All obtained and active pomanders are listed in the changed graphic symbol panel.
| Pomander | Description | Notes |
|---|---|---|
| | Increases the number of treasure coffers on the next floor. | |
| | Changes the enemy occupying a random room on the next floor into a mimic or a mandragora. | |
| | Decreases the number of enemies on the next floor. | |
| | Increases the chance enemies on the current flooring volition drop treasure coffers. | |
| | Reveals the current floor's subconscious treasure. | The effect of this pomander is carried over until an Accursed Hoard is found, therefore it'due south non required to reactive it unless its effect is consumed. |
| | Transforms user into a succubus. | |
| | Removes the Pox condition. | This is regarding the Pox debuff applied past Mimics. |
| | Transforms user into a manticore. | Manticore can't KO creatures when the floor has the Knockback Penalty enchantment. |
| | Transforms user into Kuribu. | Appears simply on level 51+. |
| | Instantly raises the first party fellow member to be KOd. | |
| | Removes all traps from the electric current floor. | This pomander doesn't remove coffer traps. |
| | Removes all enchantments from the current flooring. | |
| | Reveals the current floor'south map and the location of all subconscious traps. | While all hidden traps become visible, they can still be triggered. |
| | Decreases harm received by 40%. | This result lasts for 8 minutes. |
| | Increases harm dealt and HP recovered via healing magic past xxx%. | This effect lasts for eight minutes. |
| | Transforms all targets inside range into a frog, imp, or craven. | Polymorphs all enemies inside a xx yalm radius of the user into harmless creatures for 30 seconds, though they retain their normal HP and defence values. This consequence generates a large amount of enmity for the user. |
Note: Some pomanders won't take any outcome upon using more than than one, this includes Pomander of Purity, Pomander of Safety, Pomander of Serenity, Pomander of Sight, Pomander of Steel, and Pomander of Strength. The concluding ii will only replace any applied buff.
Traps
Equally players progress, they volition go far on floors with traps scattered around the rooms that will exist set off when walked across. These traps are invisible unless a role player has a Pomander of Sight which tin reveal their locations.
| Trap | Effect | Notes |
|---|---|---|
 Enfeebling Trap Enfeebling Trap | Causes Enervation status. | Enervation: Reduced impairment dealt and increased damage taken. |
 Impeding Trap Impeding Trap | Causes Pacify and Silence statuses (thirty seconds), pets are also affected by this. | |
 Land Mine Land Mine | Causes approximately 80% of maximum HP damage to everything in range when stepped on. | This trap stays topped off between rooms. |
 Luring Trap Luring Trap | Spawns 3 random enemies from the floor to attack you. | All enemies will aggro on the person who stepped on the trap. |
 Toading Trap Toading Trap | Causes Toad status (xx seconds), effectively transforming the histrion into a toad. | Toad debuff prevents y'all from taking any action; this includes sending a pet to attack, and even opening treasure coffers. |
Treasure coffers
Treasure coffers are special chests scattered around rooms with each floor inside Palace of the Expressionless. They contain varied items and each type works differently:
-

Golden Coffer.
-
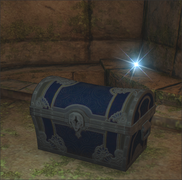
Silverish Coffer.
-
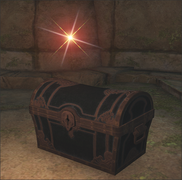
Bronze Coffer.
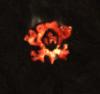
Accursed Hoard
While exploring the Palace of the Dead, players will, on occasion, discover subconscious treasure known as the Accursed Hoard. These items are counted on the character console every bit players unveil their corresponding treasure coffers. Since these coffers are hidden past default, players tin can discover them past remaining stationary for a brief menstruum of time at various locations, or they may activate a Pomander of Intuition, which reveals them. Upon using the aforementioned pomander players volition have a notification stating whether in that location'due south an Accursed Hoard in the current flooring, and can then seek out a gold glowing light to reveal the countinghouse.
Upon saving progress and exiting the Palace of the Dead, all party members are granted the same number of Accursed Hoards which will translate into a trimmed sack particular. Players can have these items to the Expedition Bishop at Quarrymill in the South Shroud (x25.1,y20.half-dozen) to have information technology appraised and discover what lies within.
-
Accursed Hoard Coffer.
-
A golden glowing light signals there'southward an Accursed Hoard Countinghouse at such location.
Contents
Depending on the Palace of the Expressionless'southward level, Accursed Hoards are translated into unlike trimmed sacks. Each sack contains varied items which range from fireworks to materia or fifty-fifty minions and mounts:
Appraising these sacks at the Trek Bishop will unveil their contents. If the outer band flashes it volition be a rare treasure, if the outer ring does not flash it will be a normal treasure.
Floors
Each floor has all mechanics mentioned before; what varies among each floor set up are enemies, patrolling enemies, insta-impale enemies, enchantments, trap density and bosses. Players can also obtain better trimmed sacks at each 50 floors, besides as a guaranteed Gelmorran Potsherd from level 100 onwards.
Floor 1-10
- Enemies
- Palace Deathmouse
- Palace Antelope
- Palace Sprite
- Palace Ziz
- Palace Coblyn
- Palace Bat
- Palace Hippocerf
- Palace Beetle
- Palace Hornet
- Palace Yarzon
- Palace Dung Protrude
- Lost Goblin
- Patrolling enemies
None.
- Boss
Palace Deathgaze
Strategy:
The boss doesn't deal a lot of damage as long equally players avert the telegraphed AoEs. The dominate will burn down an assail chosen Bombination, a indicate-bare AoE that will debuff anyone hit with Irksome, equally well equally Aeroblast which volition hit the entire party with an unavoidable set on. It is recommended to salve a Pomander of Animalism for this fight, as the Voidfire II deals heavy impairment against the dominate.
Floor xi-xx
- Enemies
- Palace Uragnite
- Palace Toad
- Palace Pudding
- Palace Slime
- Palace Nanka
- Palace Ninki-Nanka
- Palace Ochu
- Palace Biloko
- Palace Seedling
- Palace Morbol
- Patrolling enemies
- Palace Cobra
- Dominate
- Sporge
Strategy:
Like to the previous boss, As long equally players avoid the telegraphed AoEs, they will not take also much damage. The boss will employ a telegraphed carve chosen Encarmine Cuddle that deals heavy harm. The boss will also burn down an unavoidable AoE, subsequently which the boss will summon two Palace Hornets, which volition cast an unavoidable Final Sting, killing players if they aren't defeated chop-chop enough. The boss will too cast Rotten Stench, a long line AoE that deals heavy impairment if players don't avert it.
Floor 21-xxx
- Enemies
- Palace Puk
- Palace Drake
- Palace Adamantoise
- Palace Dullahan
- Palace Wivre
- Palace Peiste
- Palace Spriggan
- Palace Figure
- Palace Marolith
- Palace Centuar
- Patrolling enemies
- Palace Minotaur
- Palace Skatene
- Boss
- Ningishzida
Strategy:
This boss will create lingering AoEs effectually the arena underneath players that bargain harm and debuffs if players stand in them. Information technology is recommended that players move to the edge of the arena to drop the first few AoEs to avoid dropping them in the centre of the arena, making movement easier. The dominate will jump to the center of the loonshit and cast Fright Itself, an attack that deals massive impairment and inflicts Terror. The only condom area is in the center of the loonshit with the boss.
Floor 31-forty
- Enemies
- Nightmare Monk
- Nightmare Dahak
- Nightmare Catoblepas
- Nightmare Ogre
- Nightmare Bogy
- Nightmare Hecteyes
- Nightmare Centre
- Nightmare Gourmand
- Nightmare Mummy
- Nightmare Haagenti
- Nightmare Troubadour
- Nightmare Gnat
- Patrolling enemies
- Nightmare Succubus
- Dominate
- Ixtab
Strategy:
The boss will bandage lingering AoEs nether players which need to be dropped effectually the edges of the arena, so summon ads. The ads need to be killed, or the boss will cast Scream, striking all players and mark them with Prey, causing the ads to target those players with Tornado, killing them. The boss will follow this up with Shadow Flare, an unavoidable room-wide AoE that deals heavy harm.
Flooring 41-50
- Enemies
- Nightmare Gravekeeper
- Nightmare Bloodguard
- Nightmare Dragon
- Nightmare Wraith
- Nightmare Knight
- Nightmare Manticore
- Nightmare Hellhound
- Nightmare Gargoyle
- Nightmare Demon
- Patrolling enemies
- Nightmare Bhoot
- Nightmare Persona
- Boss
- Edda Blackbosom
Strategy:
The boss will periodically cast In Sickness, a big AoE that players need to avert, or In Health, a room-broad attack that has a safe spot under the boss. Getting striking past either of these will cause runes to calorie-free up on the floor, making the dominate's assault Night Harvest deal more damage. if 5 runes are lit upwards, the political party volition be wiped. The boss tin also inflict Disease, and casts Common cold Feet which requires players to turn away from the dominate to avoid.
Floor 51-60
- Enemies
- Palace Imp
- Palace Gremlin
- Palace Idol
- Palace Voidriga
- Palace Arch Demon
- Palace Deepeye
- Palace Anubys
- Palace Taurus
- Palace Pudding
- Palace Soulflayer
- Palace Pot
- Patrolling enemies
None.
- Dominate
- The Black Passenger
Strategy:
The dominate will summon diverse AoEs effectually the border of the arena that explode later a short while, and casts Valfodr, charging at a role player and endmost the gap between them. This will hit anyone betwixt the boss and its target, dealing heavy impairment. This will as well cause a large knockback, trying to bump players into the exploding AoEs. The boss can besides turn towards a player and cast an untelegraphed Hall of Sorrow, dropping a persisting AoE that inflicts Drain until players step out of it.
Floor 61-70
- Enemies
- Palace Tyrannosaur
- Palace Mylodon
- Palace Pteranodon
- Palace Elbst
- Palace Wivre
- Palace Croc
- Palace Diplcaulus
- Palace Bract
- Palace Sarcosuchus
- Palace Triceratops
- Palace Raptor
- Patrolling enemies
None.
- Dominate
- Yaquaru
Strategy:
The dominate casts Dunk, a signal-blank AoE That drops a puddle that buffs the boss with Haste as long as they are inside it. The boss will also inflict the main target with Heavy to brand it difficult to pull the dominate from the puddle. The boss volition also cast Electrogenesis and Deluge, two avoidable AoEs.
Floor 71-80
- Enemies
- Palace Bear
- Palace Coeurl
- Palace Bandersnatch
- Palace Wolf
- Palace Dhalmel
- Palace Lion
- Palace Cyclops
- Palace Sasquatch
- Palace Anzu
- Palace Aurochs
- Bird of the Palace
- Patrolling enemies
None.
- Dominate
- Gudanna
Strategy:
The boss will cast Charybdis, dropping a large persistent AoE that deals heavy damage and inflicts [[Windburn], a Damage over Time debuff. The dominate will likewise cast Thunderbolt, a frontal-cone AoE that deals high damage. The boss will also jump to one of the cardinals and fire Shell, covering a large portion of the loonshit in an AoE. Players volition need to move to the hitbox of the boss to avoid the attack. Finally, when the boss is close to death, the dominate volition cast Shooting star and needs to be defeated before the cast finishes.
Floor 81-ninety
- Enemies
- Palace Eruca
- Palace Gallimimus
- Palace Claw
- Palace Worm
- Palace Bomb
- Palace Chimera
- Palace Dragon
- Palace Wamouracampa
- Palace Vinegaroon
- Palace Wamoura
- Palace Hapalit
- Patrolling enemies
None.
- Dominate
- The Godmother
Strategy:
The boss will summon ads that will cause small explosions around the loonshit, requiring players to be careful where they are moving. The boss will also cast Sap on random players. The boss will also summon Grayness Bombs that need to exist defeated quickly. Finally, the boss volition regularly cast Massive Burst, an attack that can accept players to one HP and isn't afflicted by mitigation. This, however, can exist interrupted to forestall any damage. Players tin also move the Airheaded Bomb into the boss's hitbox earlier it explodes to stun the boss and terminate this assail.
Flooring 91-100
- Enemies
- Palace Hippocerf
- Palace Gourmand
- Palace Wraith
- Palace Corpse
- Palace Corse
- Palace Dragon
- Palace Swarm
- Palace Mummy
- Palace Roselet
- Palace Knight
- Patrolling enemies
- Palace Gravekeeper
- Boss
- Nybeth Obdilord
Strategy:
The boss will cast Abyss on the master target, dealing heavy damage in a small AoE. It will besides cast Globe of Pain, an unavoidable room-wide AoE. The boss casts Shackle, firing a line-AoE towards a random player. The dominate can also cast Summon Darkness, summoning several ads to the fight. Finally, the boss volition plough toward the center of the arena and cast Doom in a wide frontal-cone, killing whatsoever player hitting. For this reason, pulling the boss to the center of the arena makes the assault much easier to avoid.
Floor 101-110
- Enemies
- Deep Palace Hornet
- Deep Palace Ladybug
- Deep Palace Hyppogryph
- Deep Palace Dung Beetle
- Deep Palace Gaelicat
- Deep Palace Doblyn
- Deep Palace Ziz
- Deep Palace Yarzon
- Deep Palace Squirrel
- Deep Palace Stag
- Deep Palace Sprite
- Goblin Adventurer
- Patrolling enemies
None.
- Boss
- Alicanto
Strategy:
This boss uses the same abilities as Palace Deathgaze but hits harder and faster. The same strategies apply to this boss, however.
Floor 111-120
- Enemies
- Deep Palace Leech
- Deep Palace Morbol
- Deep Palace Gigantoad
- Deep Palace Biloko
- Deep Palace Cobra
- Deep Palace Bifericeras
- Deep Palace Bulb
- Deep Palace Slime
- Deep Palace Salamander
- Deep Palace Ochu
- Deep Palace Pudding
- Deep Palace Nanka
- Patrolling enemies
- Deep Palace Gigantoad
- Deep Palace Cobra
- Dominate
- Kirtimukha
Strategy:
This boss too uses the same mechanics as a previous floor dominate, Sporge, striking harder and faster. Rotten Stench will impale a role player immediately, nonetheless. Players also need to avoid the Hornet ads that spawn as they bargain massive damage likewise.
Floor 121-130
- Enemies
- Deep Palace Dullahan
- Deep Palace Effigy
- Deep Palace Centuar
- Deep Palace Basilisk
- Deep Palace Biast
- Deep Palace Adamantoise
- Deep Palace Urolith
- Deep Palace Wivre
- Deep Palace Spriggan
- Deep Palace Pteroc
- Patrolling enemies
- Deep Palace Minotaur
- Deep Palace Skatene
- Boss
- Alfard
Strategy:
The boss volition follow the aforementioned pattern of casting burn down and ice persisting AoEs on the flooring from Ningishzida, however information technology will bandage Fear Itself much faster and more frequently. Players will need to be ready to pull the boss to the heart of the arena immediately after the 2nd firing of the ice AoE to avoid this. It is recommended that players save Pomanders of Steel for all boss fights from hither onward.
Floor 131-140
- Enemies
- Deep Palace Guard
- Deep Palace Hecteyes
- Deep Palace Gourmand
- Deep Palace Catoblepas
- Deep Palace Dahak
- Deep Palace Tarus
- Deep Palace Troubadour
- Deep Palace Soul
- Deep Palace Mummy
- Deep Palace Ogre
- Deep Palace Monk
- Patrolling enemies
- Deep Palace Ahriman
- Boss
- Ah Puch
Strategy:
The boss will repeatedly drop shadowy AoE puddles on the floor, summon ads that need to be defeated quickly before the boss debuffs the players with Terror and the ads cast Tornado. The boss will ever follow Scream with Shadow Flare. It is recommended that players salve a Pomander of Resolution, as the Heavenly Approximate spell deals massive harm to this boss.
Floor 141-150
- Enemies
- Deep Palace Ked
- Deep Palace Hellhound
- Deep Palace Gargoyle
- Deep Palace Bhoot
- Deep Palace Demon
- Deep Palace Succubus
- Deep Palace Manticore
- Deep Palace Persona
- Deep Palace Knight
- Onyx Dragon
- Patrolling enemies
- Deep Palace Manticore
- Deep Palace Wraith
- Deep Palace Keeper
- Boss
- Tisiphone
Strategy:
This boss will cast several telegraphed AoE attacks that are easy to avoid, while summoning Fanatic Gargoyles that volition fire line AoEs in the direction they are facing. All the same, the boss will also say "Darkness, to me!", summoning four Fanatic Zombies that slowly move towards players. These zombies will pin a actor to where they are standing until they are defeated. The boss volition also summon a Fanatic Succubus, which will begin attacking players with auto-attacks and cleaves. This needs to be defeated chop-chop, otherwise the boss will eventually eat information technology, restoring its HP equal to the HP of the advertizement. In one case the ad is consumed, the boss will cast Blood Pelting, a room-wide set on that deals heavy impairment.
Flooring 151-160
- Enemies
- Deep Palace Gremlin
- Deep Palace Devilet
- Deep Palace Deepeye
- Deep Palace Abaia
- Deep Palace Soulflayer
- Deep Palace Pudding
- Deep Palace Shabti
- Deep Palace Pot
- Deep Palace Taurus
- Patrolling enemies
- Deep Palace Marolith
- Deep Palace Arch Demon
- Boss
- Totesritter
Strategy:
The dominate uses the same mechanics as the dominate from flooring threescore, The Black Rider. This boss withal deals massive damage for every attack that connects. The boss can inflict Bleed on players if they footstep into the puddles from Hail of Sorrow, which deal heavy harm per tick.
Floor 161-170
- Enemies
- Deep Palace Mylodon
- Deep Palace Pteranodon
- Deep Palace Lindwurm
- Deep Palace Croc
- Deep Palace Diplocaulus
- Deep Palace Archaeosaur
- Deep Palace Wivre
- Deep Palace Vinegaroon
- Deep Palace Triceratops
- Deep Palace Tursus
- Deep Palace Sarcosuchus
- Patrolling enemies
None.
- Boss
- Yulunggu
Strategy:
This boss is the same as Yaquaru mechanically, however the boss hits much harder, and staying in it's Douse puddle will vitrify with a stacking Haste every bit well as a Damage Upwardly. It will cast Douse much more ofttimes, and these puddles volition persist much longer. It is recommended to slowly move the boss around the edge of the arena to drop the puddles out of the mode.
Flooring 171-180
- Enemies
- Deep Palace Bear
- Deep Palace Black Coeurl
- Deep Palace Bandersnatch
- Deep Palace Anzu
- Deep Palace Dhalmel
- Deep Palace Lion
- Deep Palace Wolf
- Deep Palace Sasquatch
- Bird of the Deep Palace
- Patrolling enemies
- Deep Palace Wisent
- Deep Palace Snowclops
- Boss
- Dendainsonne
Strategy:
This dominate is similar to the boss from floor lxxx, however its mechanics have changed slightly and its attacks hit much harder:
- Charybdis fires twice in a row and will most probable kill a player if hitting.
- Trounce volition also impale a actor if hitting, and the boss only uses this attack from the north and south of the arena.
- One time the dominate reaches 15% HP, the boss will repeatedly bandage Meteor, dealing massive damage every nine-x seconds.
Floor 181-190
- Enemies
- Deep Palace Grenade
- Deep Palace Sprite
- Deep Palace Claw
- Deep Palace Crawler
- Deep Palace Archaeosaur
- Deep Palace Worm
- Deep Palace Wamoura
- Deep Palace Wamouracampa
- Deep Palace Vindthurs
- Alluvion Dragon
- Patrolling enemies
- Deep Palace Garm
- Boss
- The Godfather
Strategy
This boss is similar to The Godmother, however the bombs that explode, likewise as the boss'south Sap power will debuff a player with Deep Freeze, immobilizing the thespian and dealing massive damage. The boss has a frontal carve, Scalding Scolding, which hits for heavy impairment that will most likely impale a actor if striking.
Floor 191-200
- Enemies
- Deep Palace Iron Corse
- Deep Palace Keeper
- Deep Palace Hippogryph
- Deep Palace Gourmand
- Deep Palace Bicephalus
- Deep Palace Wraith
- Deep Palace Mummy
- Deep Palace Trap
- Deep Palace Knight
- Onyx Dragon
- Patrolling enemies
- Deep Palace Fachan
- Boss
None.
Rewards
Floor x
Under Level l
Level fifty-59
Level 60
Floor xx
Under Level 50
Level 50-59
Level 60
Floor thirty
Under Level 50
Level fifty-59
Level 60
Floor 40
Under Level 50
Level 50-59
Level 60
Floor 50
Under Level 50
Level 50-59
Level 60
Floor 60
Under Level fifty
Level 50-59
Level sixty
Floor lxx
Under Level 50
Level 50-59
Level 60
Floor 80
Nether Level 50
Level fifty-59
Level threescore
Flooring 90
Under Level 50
Level 50-59
Level 60
Floor 100
Under Level 50
Level fifty-59
Level lx
Flooring 110 and Onwards
Under Level 50
Level 50-59
Level 60
 Gelmorran Potsherd
Aetherpool weapons

If you lot have strengthened your aetherpool arm and empyrean armor to +10 in addition to clearing floor 50 of Palace of the Dead, you can receive an ![]() Aetherpool Grip, which can be used to substitution for a weapon of your choosing past speaking with Due east-Una-Kotor in Quarrymill in the Due south Shroud (X:25.0 Y:20.6). Please note that past receiving an aetherpool grip, the strength of your aetherpool arm and armor used in Palace of the Dead will be reduced by 10.
Aetherpool Grip, which can be used to substitution for a weapon of your choosing past speaking with Due east-Una-Kotor in Quarrymill in the Due south Shroud (X:25.0 Y:20.6). Please note that past receiving an aetherpool grip, the strength of your aetherpool arm and armor used in Palace of the Dead will be reduced by 10.
- Encounter too: Padjali Weapons and Kinna Weapons
Tips and tricks
The tips and tricks beneath accept been nerveless from players and are intended to make Palace of the Dead runs safer and more productive:
- Attempt and stay close to your group to avoid being wiped alone.
- When crossing rooms, walk closer to walls as there is less gamble for traps nigh walls.
- When luring an instant-impale beast, impale information technology as soon as possible to forestall the party or party members from wiping.
- Save pomanders instead of using them in any situation, unless your party is capped at three pomanders. Some guidelines are as post-obit:
- Pomander of Witching: Utilize when a lure trap is triggered or there'due south a filled room your party has to cross.
- Pomander of Rage: Employ when budgeted 2d-to-last or last floors before boss.
- Pomander of Lust: Use in the dominate floor to lower a boss' defense. One person is enough.
- Don't bother with Silver Chests if everybody in the party has +99/+99 Aetherpool Gear as these chests may trigger a bomb.
- If a silver chest flop trap has been triggered, wait a while until your health is fully recovered or a healer heals you. Moving every bit presently as a flop is triggered may be dangerous as there's a possibility for a second bomb to trigger, finer killing you and other members nearby.
- Healers are brash to aid a member suffering from Pox past casting a regen on them if possible.
Notes
- Heaven on High is the second deep dungeon introduced with Stormblood. It shares almost all rules with Palace of the Expressionless with a few exceptions.
- ↑ Or "roguelikelike", according to the standards of "How Roguelike is your game"
Source: https://ffxiv.consolegameswiki.com/wiki/Palace_of_the_Dead
0 Response to "Potd if You Die Solo Do You Have to Start From Floor 50 Again?"
Postar um comentário